SwiftUI Essentials (SwiftUI の本質)
ビルドリストとナビゲーション
Mac → セクション 7、iPhone → セクション 107 とします。
セクション 7
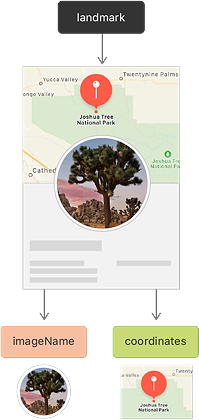
子ビューにデータを渡す
LandmarkDetail ビューは、ハードコードされた詳細をまだ使用してそのランドマークを表示しています。LandmarkRow と全く同様に、LandmarkDetail 型とそれを構成するビューは、データのソースとして landmark プロパティを使用する必要があります。
子ビューから始めて、CircleImage、MapView、LandmarkDetail の順に変換して、各行をハードコーディングするのではなく、渡されたデータを表示するようにします。
ステップ 1
CircleImage.swift で、保管されている画像プロパティを CircleImage に追加します。
これは、SwiftUI を使用してビューをビルドする場合の一般的なパターンです。カスタムビューは、特定のビューの一連の修飾子を包み込みカプセル化することがよくあります。
ステップ 2
プレビュープロバイダーを更新して、Turtle Rock の画像を渡すようにします。
プレビューロジックをいかに修正しても、ビルドが失敗するため、プレビューは更新されません。円の画像をインスタンス化する詳細ビューには、入力パラメータもまた必要です。
ステップ 3
MapView.swift で、coordinate プロパティを MapView に追加し、修正した座標を渡すようにプレビュープロバイダーを更新します。
詳細ビューには新しいパラメータを必要とする map ビューがあるため、この変更はビルドにも影響します。詳細ビューはまもなく修正されます。
ステップ 4
座標値に基づいて領域を更新するメソッドを追加します。
ステップ 5
現在の座標に基づいて領域の計算をトリガーする onAppear ビュー修飾子をマップに追加します。
ステップ 6
LandmarkDetail.swift で、Landmark プロパティを LandmarkDetail 型に追加します。
ステップ 7
LandmarkList.swift で、現在のランドマークを宛先の LandmarkDetail に渡します。
ステップ 8
LandmarkDetail ファイルで、必要なデータをカスタム型に渡します。
すべての接続が確立されて、プレビューが再び機能し始めます。
ステップ 9
コンテナを VStack から ScrollView に変更して、ユーザが説明的なコンテンツをスクロールできるようにし、不要になったスペーサーを削除します。
ステップ 10
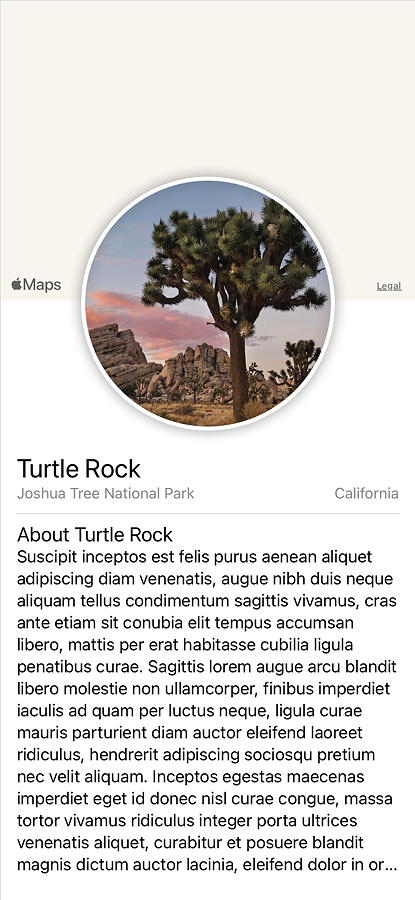
最後に、navigationTitle(_:) 修飾子を呼び出して、詳細ビューを表示するときにナビゲーションバーにタイトルを付け、 navigationBarTitleDisplayMode(_:) 修飾子を呼び出してタイトルをインラインで表示します。
ナビゲーションの変更は、ビューがナビゲーションスタックの一部である場合にのみ効果があります。
ステップ 11
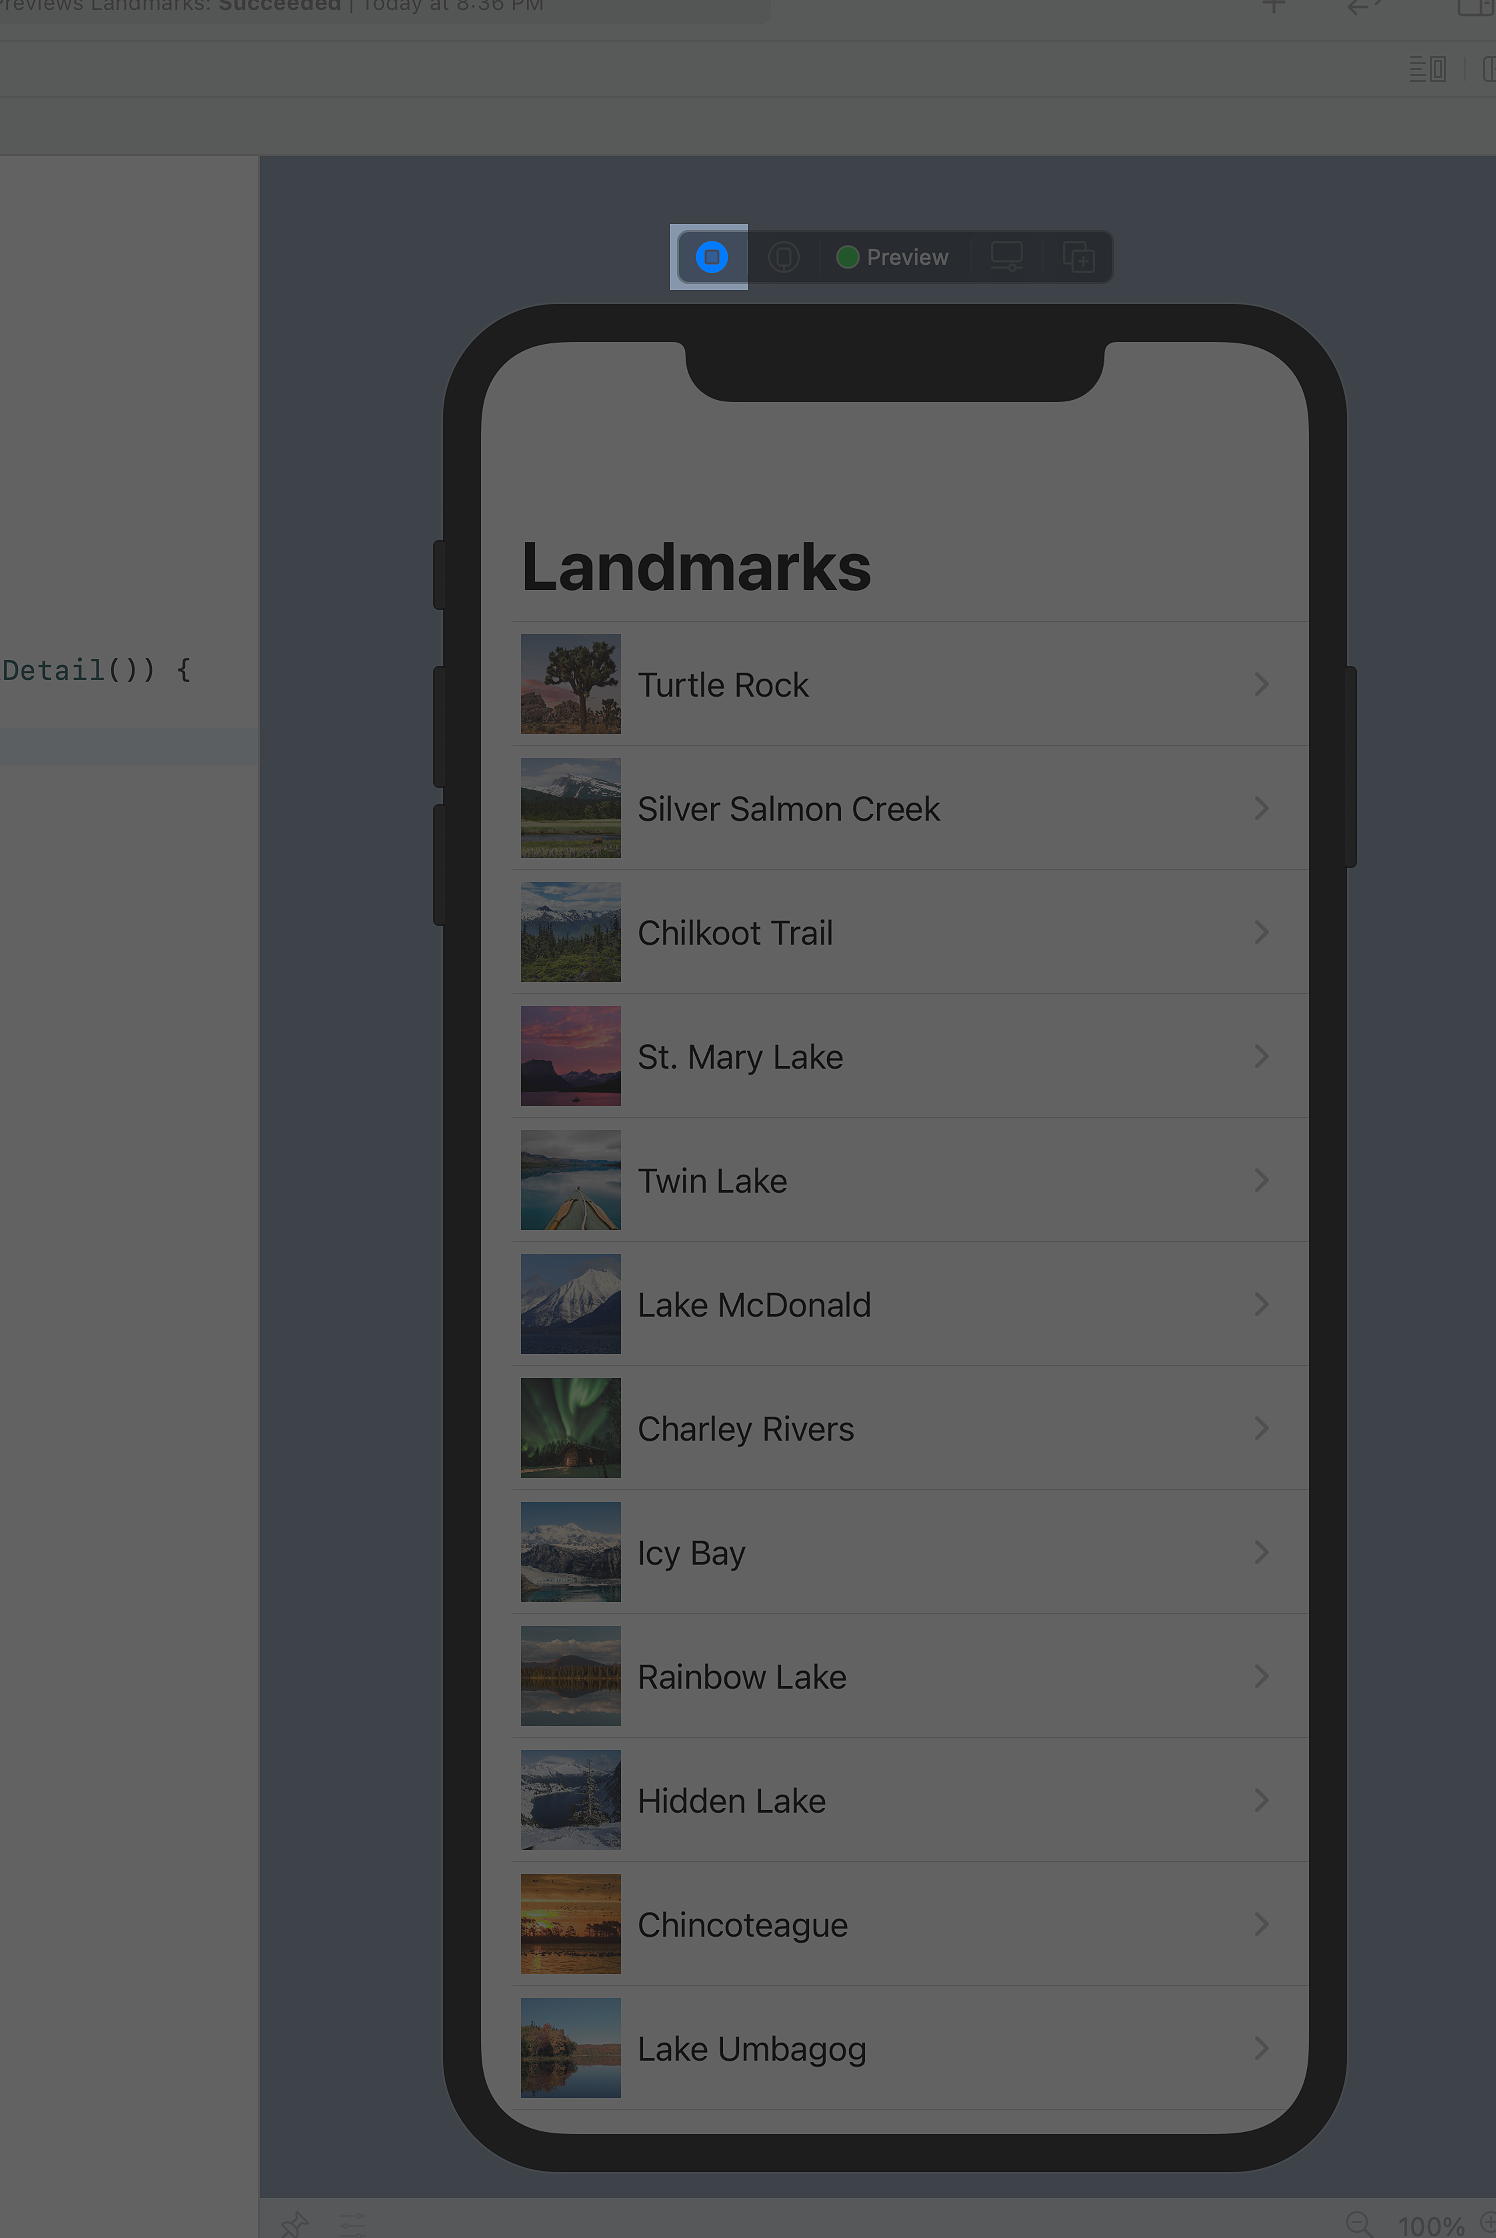
ライブプレビューに切り替えて、リストからナビゲートしたときに詳細ビューに正しいランドマークが表示されることを確認します。
![]() CircleImage.swift
CircleImage.swift
- import SwiftUI
- struct CircleImage: View {
- var image: Image
- var body: some View {
- image
- .clipShape(Circle())
- .overlay(Circle().stroke(Color.white, lineWidth: 4))
- .shadow(radius: 7)
- }
- }
- struct CircleImage_Previews: PreviewProvider {
- static var previews: some View {
- CircleImage()
- }
- }
上記のリストの 16 行目を以下のように書き足します。
- CircleImage(image: Image("turtlerock"))
![]() MapView.swift
MapView.swift
- import SwiftUI
- import MapKit
- struct MapView: View {
- var coordinate: CLLocationCoordinate2D
- @State private var region = MKCoordinateRegion()
- center: CLLocationCoordinate2D(latitude: 34.011_286, longitude: -116.166_868),
- span: MKCoordinateSpan(latitudeDelta: 0.2, longitudeDelta: 0.2)
- )
- var body: some View {
- Map(coordinateRegion: $region)
- }
- }
- struct MapView_Previews: PreviewProvider {
- static var previews: some View {
- MapView(coordinate: CLLocationCoordinate2D(latitude: 34.011_286, longitude: -116.166_868))
- }
- }
上記のリストの 14 行目に、以下のように書き足します。
- private func setRegion(_ coordinate: CLLocationCoordinate2D) {
- region = MKCoordinateRegion(
- center: coordinate,
- span: MKCoordinateSpan(latitudeDelta: 0.2, longitudeDelta: 0.2)
- )
- }
- }
- struct MapView_Previews: PreviewProvider {
上記のリストの 6 行目から 12 行目を以下のように書き換えます。
- @State private var region = MKCoordinateRegion()
- var body: some View {
- Map(coordinateRegion: $region)
- .onAppear {
- setRegion(coordinate)
- }
![]() LandmarkDetail.swift
LandmarkDetail.swift
- import SwiftUI
- struct LandmarkDetail: View {
- var landmark: Landmark
- var body: some View {
- VStack {
- MapView()
- .ignoresSafeArea(edges: .top)
- .frame(height: 300)
- CircleImage()
- .offset(y: -130)
- .padding(.bottom, -130)
- VStack(alignment: .leading) {
- Text("Turtle Rock")
- .font(.title)
- .foregroundColor(.primary)
- HStack {
- Text("Joshua Tree National Park")
- Spacer()
- Text("California")
- }
- .font(.subheadline)
- .foregroundColor(.secondary)
- Divider()
- Text("About Turtle Rock")
- .font(.title2)
- Text("Descriptive text goes here.")
- }
- .padding()
- Spacer()
- }
- }
- }
- struct LandmarkDetail_Previews: PreviewProvider {
- static var previews: some View {
- LandmarkDetail(landmark: landmarks[0])
- }
- }
![]() LandmarkList.swift
LandmarkList.swift
- import SwiftUI
- struct LandmarkList: View {
- var body: some View {
- NavigationView {
- List(landmarks) { landmark in
- NavigationLink(destination: LandmarkDetail(landmark: landmark)) {
- LandmarkRow(landmark: landmark)
- }
- }
- .navigationTitle("Landmarks")
- }
- }
- }
- struct LandmarkList_Previews: PreviewProvider {
- static var previews: some View {
- LandmarkList()
- }
- }
上記の LandmarkDetail.swif のリストで 8、12、17、22、24、31、33 行目をそれぞれ以下のように書き換えます。
![]() LandmarkDetail.swift
LandmarkDetail.swift
- MapView(coordinate: landmark.locationCoordinate)
- CircleImage(image: landmark.image)
- Text(landmark.name)
- Text(landmark.park)
- Text(landmark.state)
- Text("About \(landmark.name)")
- Text(landmark.description)
さらに 7 行目を以下のように書き換え、37 行目を削除します。